 Save to Pinterest
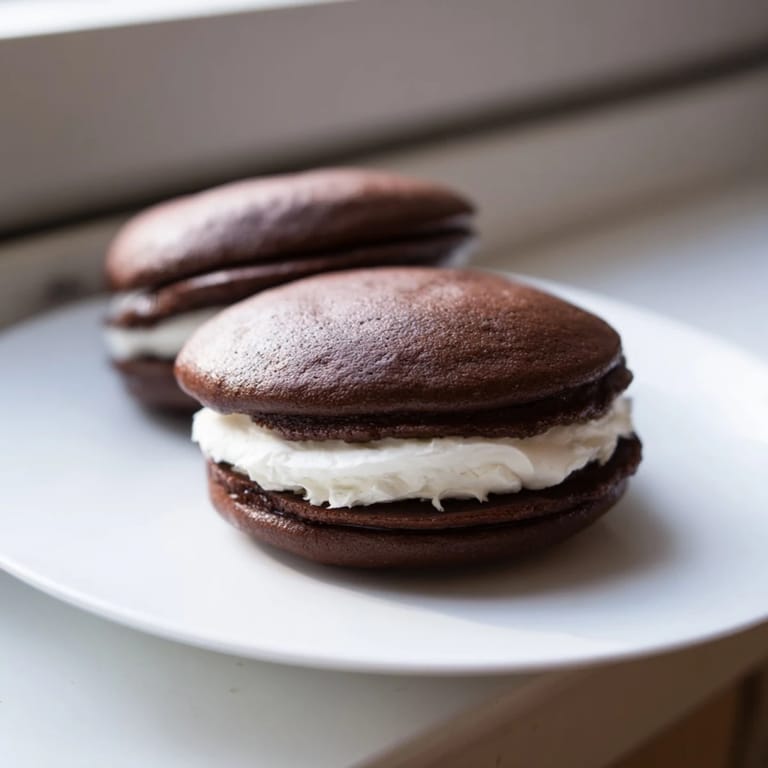
 My grandmother kept a tin of whoopie pies on the kitchen counter every summer, and I'd sneak one whenever I'd visit her Pennsylvania farmhouse. The way the soft chocolate cake would give way to that marshmallow filling was pure magic to a kid who thought homemade desserts only happened at birthdays. Years later, I finally asked for her recipe, and what she handed me was barely three pages of notes scrawled in her handwriting. Now these are the first thing I bake when I want to feel like I'm sitting in her kitchen again, even if I'm three states away.
I brought these to a potluck last spring, and someone's eight-year-old literally gasped when she bit into one. Her mom asked for the recipe three times that afternoon, and I realized these little cakes had somehow become the thing people ask me to bring to every gathering now. There's something about that cloud of marshmallow meeting rich chocolate that just stops conversations.
Ingredients
- All-purpose flour (2 cups): The backbone of your cakes, and measuring by weight here matters more than you'd think because it's easy to pack flour too tight by accident.
- Unsweetened cocoa powder (¾ cup): Don't skip the sifting step or you'll have grainy cakes that taste like you bit into sand.
- Baking soda (1½ teaspoons): This is your leavening agent and what makes these rise into those perfect puffy domes.
- Baking powder (½ teaspoon): A backup that works with the baking soda to ensure your cakes stay tender and light.
- Salt (½ teaspoon): Just enough to make the chocolate taste like itself and not muted or flat.
- Granulated sugar (1 cup): Creaming this with butter and oil creates tiny air pockets that make the crumb tender.
- Unsalted butter and vegetable oil (½ cup each): Using both gives you moisture and richness without the cakes becoming greasy or dense.
- Eggs (2 large): These bind everything and add structure, so don't use eggs straight from the fridge or your batter will split.
- Buttermilk (1 cup): The acidity reacts with the baking soda to create lift and keeps the crumb impossibly soft.
- Vanilla extract (2 teaspoons for cakes, 1 for filling): Real vanilla makes a noticeable difference here, so splurge a little if you can.
- Unsalted butter for filling (¾ cup): Softness is key, so leave this out for 30 minutes before you start.
- Powdered sugar (2 cups): Sifting this prevents lumpy filling that feels gritty on your tongue.
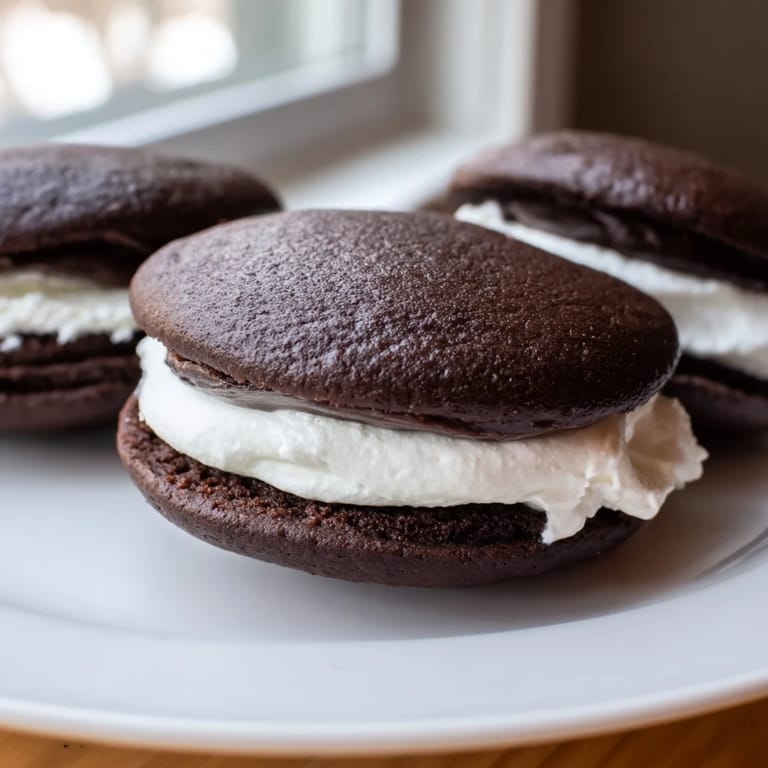
- Marshmallow creme (one 7 oz jar): This is what makes them whoopie pies and not just chocolate sandwiches, so don't try to substitute it with marshmallows.
Tired of Takeout? 🥡
Get 10 meals you can make faster than delivery arrives. Seriously.
One email. No spam. Unsubscribe anytime.
Instructions
- Get your oven ready:
- Preheat to 350°F and line two baking sheets with parchment paper so your cakes don't stick or spread too thin on the edges. This step takes five minutes but saves you from scraping burnt chocolate off your sheets later.
- Mix the dry ingredients:
- Whisk flour, cocoa powder, baking soda, baking powder, and salt together in a medium bowl until there are no streaks of cocoa left. You want everything evenly distributed so each cake has the same rise and texture.
- Cream your wet base:
- Beat sugar, softened butter, and oil until it looks pale and fluffy, which takes about three minutes with an electric mixer. Add eggs one at a time, waiting for each to fully incorporate before adding the next, then mix in vanilla until you can't see any streaks.
- Build your batter:
- Alternate adding flour mixture and buttermilk, starting with flour and ending with flour, mixing only until each addition just disappears. Overmixing develops gluten and makes your cakes tough, so stop as soon as you don't see dry streaks anymore.
- Portion and bake:
- Drop two-tablespoon-sized mounds onto your prepared sheets about two inches apart, then bake for 10 to 12 minutes until the tops spring back when you gently touch them. The cakes will look almost underdone, but that's exactly when you want to pull them out.
- Cool with patience:
- Let them sit on the baking sheet for five minutes before moving them to a cooling rack, because moving them too early when they're still hot will crack them. Let them cool completely before filling or the filling will melt and slide right off.
- Make your filling:
- Beat softened butter until it's completely smooth, then gradually add sifted powdered sugar a bit at a time so you don't end up with clouds of sugar everywhere. Mix in marshmallow creme, vanilla, and salt, then beat until it's light and fluffy, which should take about two minutes.
- Assemble your pies:
- Spread or pipe filling onto the flat side of half your cakes, then top with the remaining cakes to create sandwiches with the flat sides facing each other. A small ice cream scoop makes this faster if you're making the full batch.
- Chill before serving:
- Pop these in the fridge for 30 minutes so the filling firms up and the cakes stay intact when you bite into them rather than squishing apart.
 Save to Pinterest
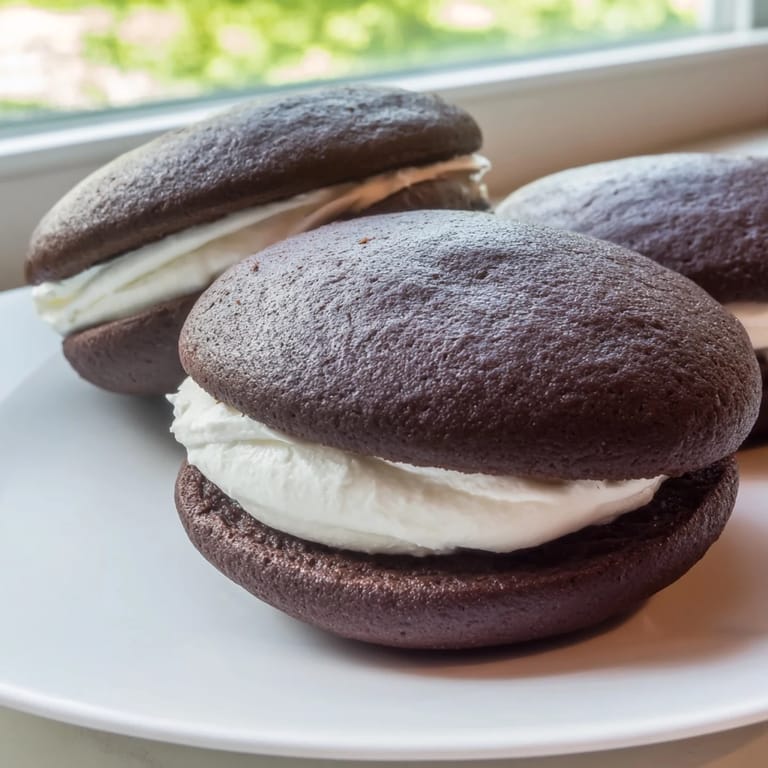
 I once made a batch the morning of my daughter's school bake sale, and she asked if she could bring them instead of store-bought cookies. Seeing her hand-sell those whoopie pies to other parents and kids, explaining what made them special, taught me that the best recipes are the ones your kids want to claim as their own.
The Marshmallow Mystery
When I first made these, I tried substituting marshmallow fluff with whipped marshmallow cream from scratch because I thought I was being fancy. The pies turned out grainy and separated within hours, and I learned the hard way that marshmallow creme has cornstarch and stabilizers that actually do something important. Now I stick with the jarred version and save my creativity for other things.
Chocolate Depth and Flavor
The cocoa powder in this recipe is doing most of the heavy lifting, so quality matters more than quantity. I switched from standard cocoa to Dutch-processed cocoa once and got a noticeably richer, less bitter flavor that made people ask what I'd changed. If you want to go deeper, the notes mention adding a teaspoon of espresso powder to the batter, and that's genuinely transformative if you like your chocolate complex.
Storage and Gifting Wisdom
These keep at room temperature in an airtight container for three days, which is perfect for making ahead or packaging them as gifts. The filling stays soft and the cakes stay moist, but after the third day they start to dry out slightly, so eat them fresh or freeze them unfilled in an airtight container for up to a month.
- Stack them flat in a container with parchment between layers so they don't stick together or get crushed.
- If you're gifting them, wrap the whole package in cellophane and tie a ribbon around it for that homemade bakery look.
- These are best served at room temperature when the marshmallow filling is soft and pillowy rather than cold and firm from the fridge.
 Save to Pinterest
 Every time I make whoopie pies now, I think about my grandmother and how she passed this recipe down not just as instructions but as a way to show up for people. That's what these little chocolate sandwiches have become in my life.
Recipe FAQs
- → What gives the cakes their soft texture?
The combination of buttermilk, vegetable oil, and baking soda creates a tender crumb, keeping the cakes moist and soft.
- → How is the cream filling made fluffy?
Beating softened butter with powdered sugar before adding marshmallow creme and vanilla extract creates a light, fluffy filling.
- → Can I add flavors to the chocolate batter?
Yes, adding a pinch of espresso powder deepens the chocolate flavor without overpowering the other ingredients.
- → What’s the best way to assemble the sandwiches?
Spread or pipe the filling onto the flat side of half the cakes, then press the remaining cakes on top for even sandwiches.
- → How long should the assembled cakes chill?
Chilling for about 30 minutes firms up the filling and enhances the overall texture before serving.