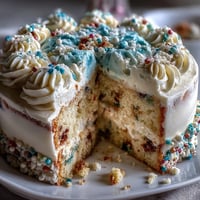
 Save to Pinterest
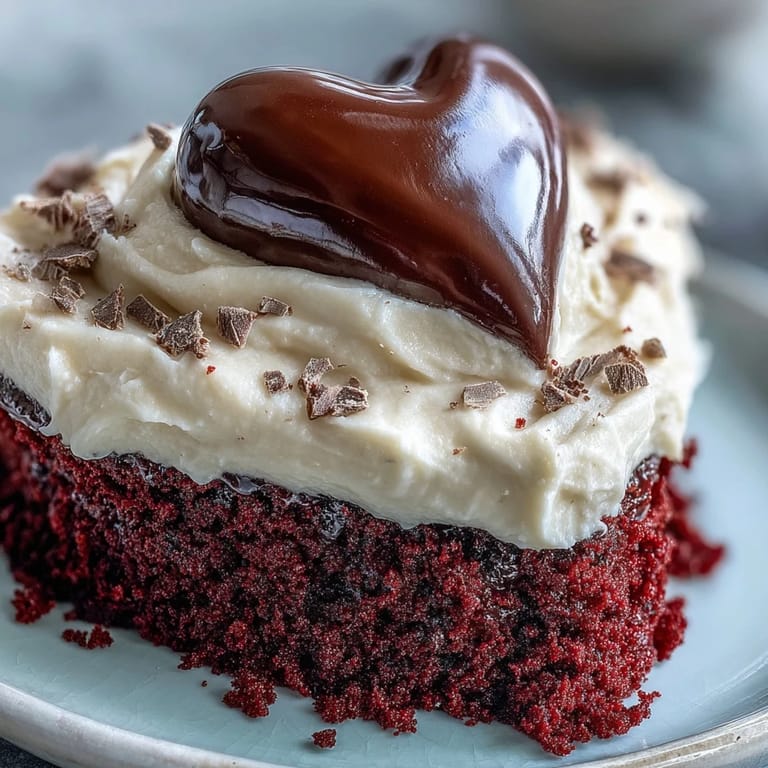
 The first time I attempted a red cake with a chocolate silhouette, I accidentally piped the Betty Boop backward and ended up with a mirror image that looked like she was winking at everyone who walked by. My sister still laughs about that cake every time she visits. Now I always double-check my stencil placement before the chocolate sets. This recipe has evolved through plenty of trial and error, but that playful mistake taught me that sometimes imperfections make the best memories.
I made this for my nieces 12th birthday last spring and she actually gasped when she saw the Betty Boop silhouette against the red cake. Her friends crowded around the dessert table taking photos before anyone even took a bite. Watching them carefully select their slices trying to get the perfect ratio of chocolate to cake to frosting made all those hours of measuring and waiting totally worth it.
Ingredients
- Cake flour: Lower protein than all purpose flour giving you that tender velvety crumb that practically melts
- Unsweetened cocoa powder: Just enough to deepen the red without turning the cake chocolatey or overpowering
- Room temperature butter and eggs: The absolute most important thing I have learned for evenly baked layers
- Buttermilk: Adds tenderness and a subtle tang that balances all that sugar beautifully
- Red gel food coloring: Gel gives you that vivid red without adding liquid like traditional food coloring does
- White vinegar: Reacts with the baking soda creating extra lift for a lighter texture
- Cream cheese: Full fat brick style not the tub kind which stabilizes better for frosting
- Dark chocolate or candy melts: Temper properly and your silhouette will snap cleanly when you peel it from the parchment
Tired of Takeout? 🥡
Get 10 meals you can make faster than delivery arrives. Seriously.
One email. No spam. Unsubscribe anytime.
Instructions
- Prep your pans and preheat:
- Heat your oven to 350°F and grease two 9 inch heart pans lining the bottoms with parchment paper for easy release later.
- Whisk the dry ingredients:
- In a medium bowl combine the sifted cake flour cocoa powder baking powder baking soda and salt until everything is evenly distributed.
- Cream the butter and sugar:
- Beat the butter for 1 minute until creamy then gradually add sugar beating for 2 to 3 minutes until the mixture looks pale and fluffy.
- Add eggs one by one:
- Add each egg individually beating on low just until blended and scraping down the bowl sides to keep everything incorporated evenly.
- Mix in color and flavor:
- Stir in the red gel coloring vanilla extract and white vinegar until the batter becomes this stunning uniform red.
- Combine wet and dry ingredients:
- With the mixer on low alternate adding one third of the dry ingredients then half the buttermilk repeating until everything is just combined and being careful not to overmix.
- Activate the baking soda:
- Mix the vinegar with the baking soda in a small cup watch it foam slightly then fold gently into the batter.
- Bake the layers:
- Divide batter evenly between pans smooth the tops and bake for 25 to 30 minutes until a toothpick comes out clean from the center.
- Cool completely:
- Let the cakes rest in pans for 10 minutes then run a knife around the edges invert onto wire racks and cool entirely before frosting.
- Make the frosting:
- Beat cream cheese and butter for 2 minutes until smooth then gradually add powdered sugar salt and vanilla beating until fluffy.
- Assemble the cake:
- Level any domes with a serrated knife place one layer on a board frost the top add the second layer and refrigerate 15 minutes before applying a crumb coat.
- Apply final frosting:
- Chill the crumb coated cake for 10 minutes then add a final smooth layer using an offset spatula warmed under hot water for the sleekest finish.
- Create the silhouette:
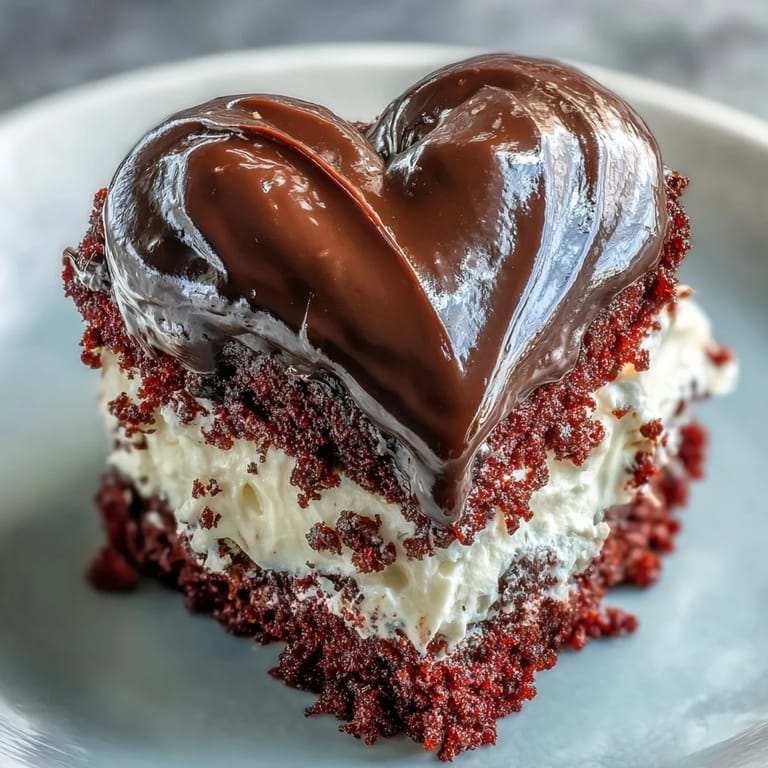
- Place your stencil under parchment paper pipe or brush melted dark chocolate over the outline and let it set completely at room temperature or in the fridge.
- Place the chocolate:
- Carefully peel the Betty Boop silhouette from the parchment and position it on the center of the cake pressing gently so it adheres.
- Final touches:
- Add frosting rosettes edible glitter or red sugar pearls around the edges then chill the whole cake for 30 minutes before slicing with a warm knife.
 Save to Pinterest
 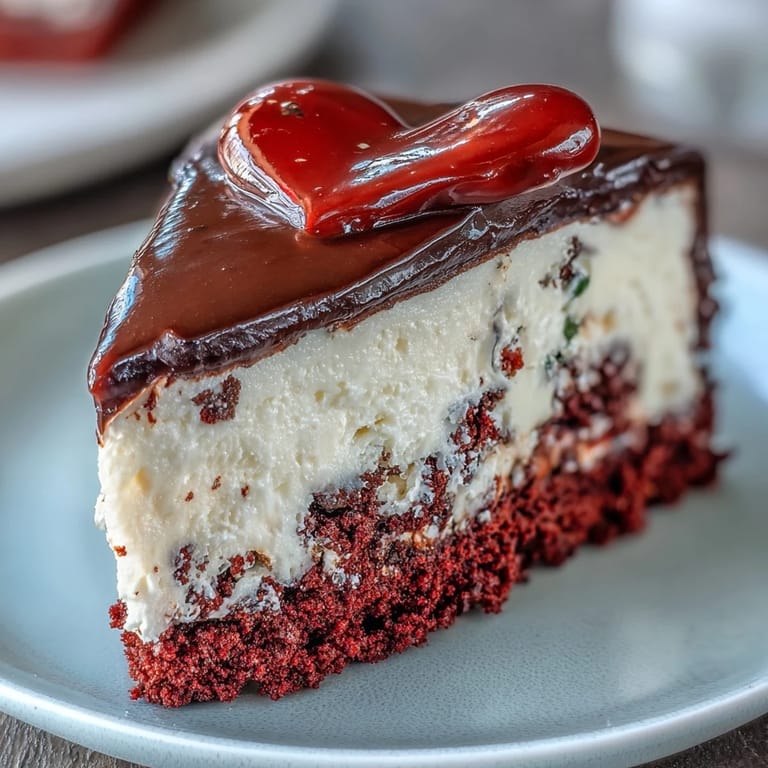 Save to Pinterest
 This cake has become my go to for celebrations because it somehow feels both retro and modern at the same time. The combination of soft red cake creamy frosting and crisp chocolate creates such satisfying textures that people always go back for seconds.
Making The Chocolate Silhouette
I have learned that working quickly with melted chocolate makes all the difference. Keep your chocolate warm but not hot and pipe or brush it over your stencil in one smooth motion. If the chocolate starts to cool it becomes difficult to spread evenly.
Frosting Like A Pro
That trick about heating your offset spatula under hot water is not just for show. The warmth helps the frosting glide across the cake surface eliminating those stubborn lines and giving you that professional bakery finish. Wipe the spatula dry between each pass.
Storage And Serving
This cake actually tastes better after chilling overnight because the flavors have time to meld together and the frosting firms up nicely. Always slice with a clean knife dipped in hot water and wiped dry for those picture perfect portions.
- Bring chilled cake to room temperature 20 minutes before serving
- The chocolate silhouette stays crisp for days when refrigerated properly
- Leftovers make an incredible breakfast with coffee
 Save to Pinterest
  Save to Pinterest
 There is something genuinely joyful about cutting into this cake and revealing that playful silhouette underneath. Hope it brings as much delight to your table as it has to mine.
Recipe FAQs
- → How do I achieve vibrant red color without thinning the batter?
Use gel-based food coloring instead of liquid. Gel provides concentrated pigment without adding extra moisture that could alter the batter's consistency and affect the cake's texture.
- → Can I make the chocolate silhouette ahead of time?
Yes. Prepare the dark chocolate outline up to 3 days in advance. Store flat between parchment sheets in an airtight container at room temperature or in the refrigerator until ready to place on the frosted cake.
- → Why does the recipe call for both white and distilled vinegar?
White vinegar enhances the red color's brightness and activates with cocoa, while distilled vinegar mixed with baking soda creates a chemical reaction that produces extra lift for a lighter, more tender crumb.
- → How should I store leftovers?
Cover the cake tightly with plastic wrap or place in an airtight container. Refrigerate for up to 4 days. Bring to room temperature for 20 minutes before serving for the best flavor and texture.
- → Can I use regular flour instead of cake flour?
For best results, use cake flour which has lower protein content for a tender crumb. If substituting all-purpose flour, remove 2 tablespoons per cup and replace with cornstarch to mimic cake flour's texture.
- → What's the purpose of the crumb coat?
A thin initial layer of frosting seals in loose crumbs and creates a smooth foundation. Chilling this layer sets the structure, allowing the final coat of frosting to apply cleanly without dragging crumbs through the finish.