 Save to Pinterest
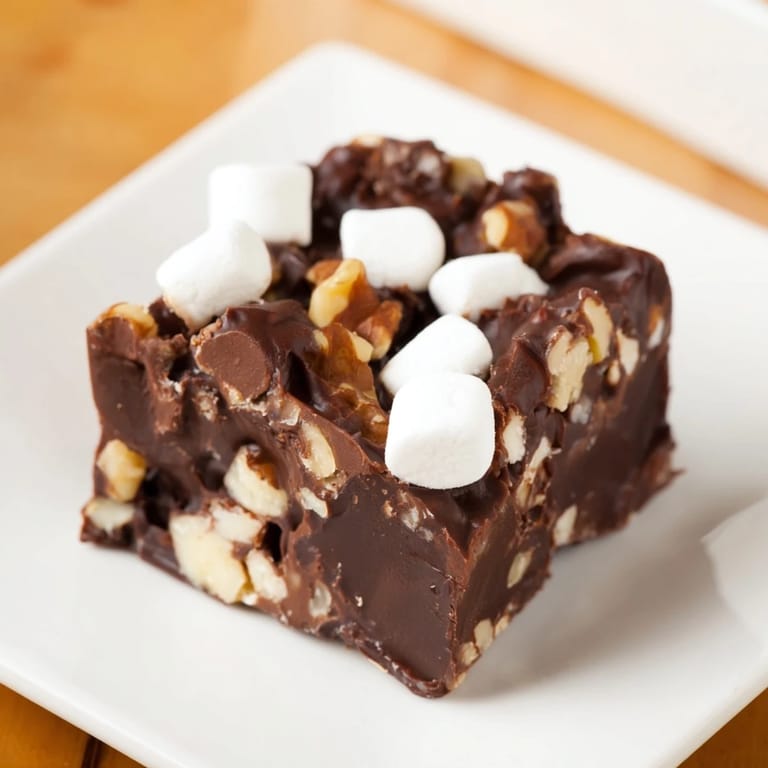
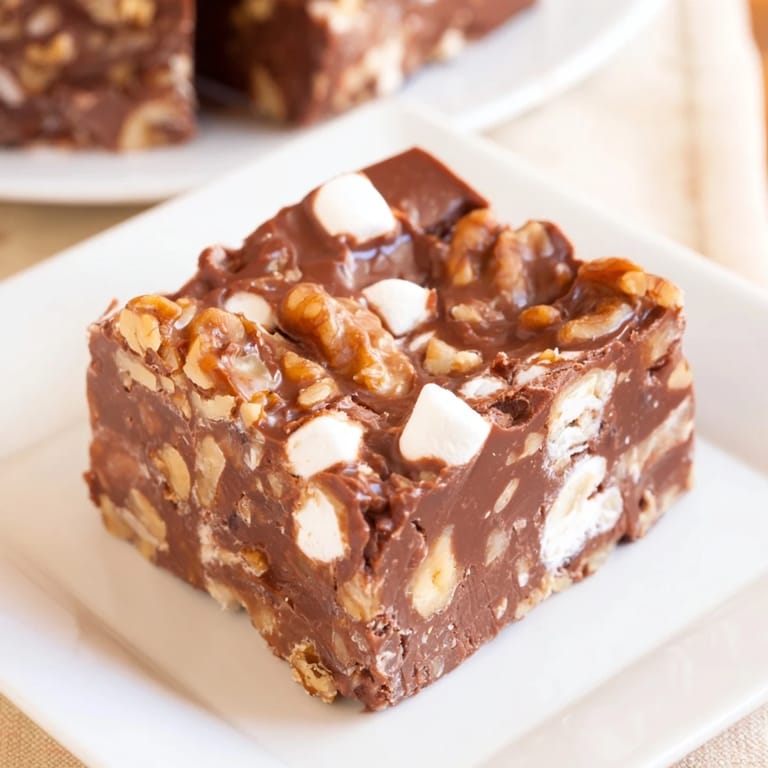
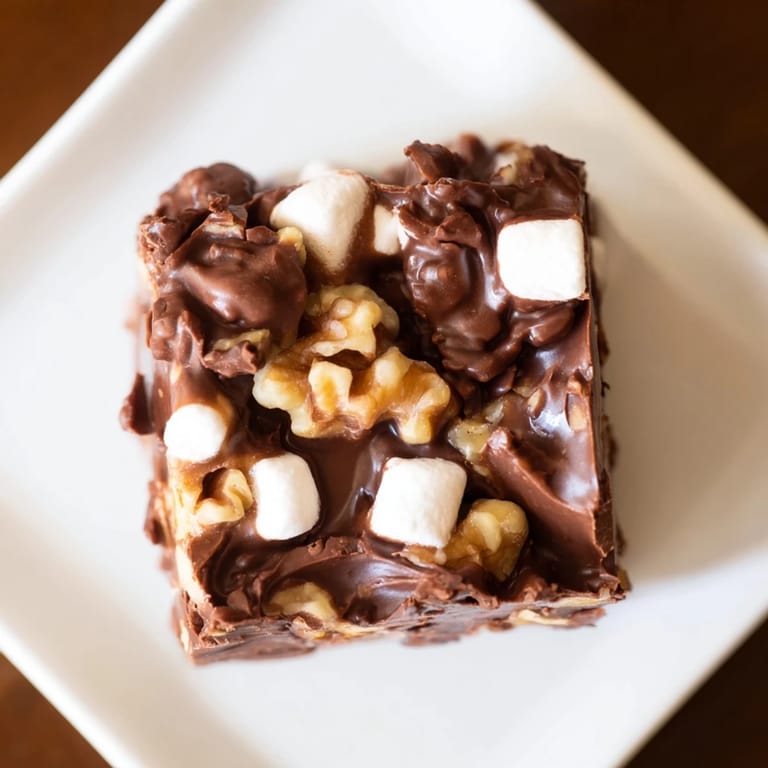
 There's something about rocky road fudge that takes me back to my aunt's kitchen on lazy Sunday afternoons, when she'd pull out her beat-up saucepan and declare it was time to make "the good stuff." She never used a recipe, just melted chocolate with that certainty that comes from doing something a hundred times before. I watched her fold in marshmallows and nuts with the kind of casual precision that made it look effortless, though I'd later learn there's actually technique hidden in that ease. The first bite was always mine, and I remember the contrast—that smooth, fudgy foundation giving way to little pockets of chewiness and crunch that surprised you mid-chew. Now when I make it, I'm chasing that exact feeling, and somehow it works.
I made this for my coworkers during the pandemic when we were all working from home, and I shipped boxes of it across three states. One person emailed back to say they'd eaten half the box in a sitting and wanted to know if I was upset, which made me laugh—that's exactly the reaction you want with fudge. It became this little tradition, a small act of connection wrapped in parchment paper.
Ingredients
- Semi-sweet chocolate chips (3 cups): These are forgiving because they're already tempered, so you don't have to worry about seizing or blooming like you would with bar chocolate.
- Sweetened condensed milk (1 can, 14 oz): This is the secret ingredient that makes the fudge creamy without needing to fuss with temperatures or a candy thermometer.
- Unsalted butter (4 tbsp), cubed: Cutting it into pieces helps it melt evenly and integrate smoothly into the chocolate.
- Vanilla extract (1 tsp): It rounds out the chocolate flavor and prevents the fudge from tasting flat or one-dimensional.
- Mini marshmallows (1½ cups): The mini ones stay suspended throughout instead of clumping to the bottom, and they hold their shape better than large ones.
- Chopped walnuts or pecans (1 cup): Toast them lightly if you have time—it deepens their flavor and gives the fudge an extra layer of sophistication.
Tired of Takeout? 🥡
Get 10 meals you can make faster than delivery arrives. Seriously.
One email. No spam. Unsubscribe anytime.
Instructions
- Prep your pan:
- Line an 8x8-inch baking pan with parchment paper and let it overhang on two sides like handles. This matters because it's the difference between wrestling your fudge out with a knife and simply lifting it out whole.
- Melt the trinity:
- Combine chocolate chips, condensed milk, and butter in a medium saucepan over low heat, stirring constantly until the mixture is completely smooth and glossy. You'll notice it transform from grainy and hesitant to silky in about 5 minutes; trust that moment and don't rush it with higher heat.
- Season and cool slightly:
- Remove from heat and stir in vanilla extract, letting the pan sit off the burner for just a minute so the mixture loses its aggressive heat. This prevents the marshmallows from turning into sad little puddles.
- Fold in the texture:
- Gently fold the marshmallows and nuts into the chocolate using a spatula, moving from the bottom up and turning the mixture over itself rather than stirring. The idea is to keep the marshmallows intact, so treat them like they're precious.
- Set it to memory:
- Pour the mixture into your prepared pan and spread it evenly with the spatula, smoothing the top as much as you like. Some people want a perfectly level surface; others don't mind a slightly rustic finish.
- Patience is everything:
- Refrigerate for at least 2 hours, which is enough time for the fudge to set completely and for the flavors to settle. I usually make this in the morning and cut it in the evening, which gives me something to look forward to.
- Lift and cut:
- Use those parchment handles to lift the entire slab out of the pan, then place it on a cutting board. A sharp knife dipped in hot water and wiped clean between cuts gives you neat squares instead of crumbly edges.
- Store with care:
- Keep your fudge in an airtight container in the refrigerator, where it'll stay fresh for up to a week, though it rarely lasts that long.
 Save to Pinterest
 There was a moment during the pandemic when my neighbor knocked on my door with a face like she'd had the worst day, and I handed her a little box of this fudge without saying much. She came back the next day just to tell me it helped, which sounds small until you realize that's exactly what food is supposed to do sometimes.
Making It Your Own
The beauty of this recipe is that it's a foundation for your own experimentation. I've made versions with crushed graham crackers stirred in for a s'mores twist, swapped the walnuts for almonds when I was trying to use up what was in the pantry, and even made a coconut version by adding shredded toasted coconut alongside the nuts. The principle stays the same—you're just playing with texture and flavor combinations to match what sounds good to you on any given day.
The Texture Trick
The reason this fudge feels so luxurious compared to other recipes is the balance between the dense chocolate base and the pillowy pockets of marshmallow. When you bite through, there's a moment of surprise, a little give before the chew. That's not accident—it's why you fold gently instead of stirring, why you use mini marshmallows instead of large, and why timing matters. The condensed milk keeps everything soft enough that you're never biting into something that feels hard or brittle, just this pleasant softness with little textural interruptions.
Serving and Pairing
Serve these straight from the refrigerator because the cold brings out the fudge's richness and keeps everything from feeling greasy in your mouth. The contrast between the cold fudge and the warm inside of your mouth is part of the pleasure. If you want to get fancy, a small glass of cold milk is the obvious pairing, but honestly, strong black coffee cuts through the sweetness in an unexpected way and makes you feel like you've turned a simple treat into something more intentional.
- Wrap individual pieces in parchment paper if you're giving them as gifts, which makes them feel precious even though they cost almost nothing to make.
- If they soften in warm weather, pop them back in the fridge for a few minutes—they'll firm right up again.
- Let them sit out for about thirty seconds before eating if they're cold from the fridge, just enough to lose that numb-mouth feeling.
 Save to Pinterest
 This is the fudge I make when I want to give someone something that tastes like care, when I need to feel the comfort of something simple and familiar, or when an ordinary day needs a little sweetness to prove it mattered. That's probably all you need to know.
Recipe FAQs
- → What type of chocolate works best?
Semi-sweet chocolate chips melt smoothly and balance sweetness well in this preparation.
- → Can I substitute the nuts used?
Yes, walnuts or pecans can be replaced with almonds or hazelnuts to vary the flavor and crunch.
- → How long should it chill before cutting?
Allow at least two hours in the refrigerator to ensure the mixture sets firmly for clean slicing.
- → What gives this dessert its creamy texture?
The combination of sweetened condensed milk and butter melted with the chocolate creates a smooth, creamy base.
- → Are there any allergen considerations?
Contains dairy, nuts, soy from chocolate, and gelatin from marshmallows. Use vegetarian marshmallows if needed.
- → Can extra crunch be added?
Adding crushed graham crackers enhances texture and adds a subtle crunch to each bite.