 Save to Pinterest
 My grandmother kept a worn copper pot in the back of her kitchen cabinet, one she only brought out when she wanted to make fudge. I didn't understand the ritual of it until I watched her stir that bubbling mixture, her eyes fixed on an old candy thermometer like she was reading tea leaves. The moment she pulled it off the heat and folded in the chocolate, the kitchen filled with this deep, almost velvety smell that made everything else disappear. Making fudge taught me that some things can't be rushed, but once you understand the science, they become almost meditative.
Years ago, I made a batch on a snowy afternoon when a friend stopped by unexpectedly. By the time it had cooled, we were wrapping squares in wax paper while standing at the kitchen counter, and she took half home in a borrowed container she never returned. I didn't mind—I'd rather lose a container than forget how happy that simple gesture made her.
Ingredients
- Unsalted butter (1 cup/225 g): Use real butter here; it's the foundation of the creaminess, and unsalted lets you control the salt level yourself.
- Whole milk (2/3 cup/160 ml): Don't skip this or substitute with condensed milk; it's what keeps your fudge from becoming grainy.
- Granulated sugar (3 cups/600 g): This is where the alchemy happens—it reaches that magic soft-ball temperature and transforms everything.
- Semi-sweet chocolate chips or chopped chocolate (2 cups/340 g): Quality matters here because it's the star; I learned this the hard way with bargain chocolate that tasted waxy.
- Pure vanilla extract (1 tsp): The good stuff makes a real difference in depth; imitation won't give you the same warmth.
- Fine sea salt (1/4 tsp): A pinch of salt makes the chocolate sing and cuts through the sweetness like a secret.
Tired of Takeout? 🥡
Get 10 meals you can make faster than delivery arrives. Seriously.
One email. No spam. Unsubscribe anytime.
Instructions
- Prepare your stage:
- Line an 8x8-inch pan with parchment paper, letting it overhang on two sides—this is how you'll lift the whole block out without it breaking apart. Give yourself room to work.
- Combine and stir:
- Melt the butter over medium heat in a heavy saucepan, then add the sugar and milk, stirring until it's all combined and starting to bubble gently. You're aiming for smooth, not lumpy.
- Reach the boil:
- Keep stirring constantly as the mixture comes to a full rolling boil, about 2-3 minutes. Don't look away—this is where paying attention saves you from a scorched batch.
- Hit the target temperature:
- Clip a candy thermometer to the pan and continue cooking, stirring often, until it reaches 238°F (the soft-ball stage), which takes about 10-15 minutes. You'll notice the mixture darkening slightly and thickening as you approach the finish line.
- Work fast when it's off the heat:
- The moment you pull the pan off the flame, add the chocolate, vanilla, and salt all at once. Stir vigorously—this is your only chance to beat air into the mixture and get that glossy, thick texture before it sets.
- Pour and smooth:
- Pour everything into your prepared pan quickly and use a spatula to smooth the top. Work with a light hand; you don't want to deflate all those tiny bubbles you just created.
- Let time do the work:
- Leave it at room temperature for 2 hours to set completely. Resist the urge to move it around or check on it constantly.
- Slice and serve:
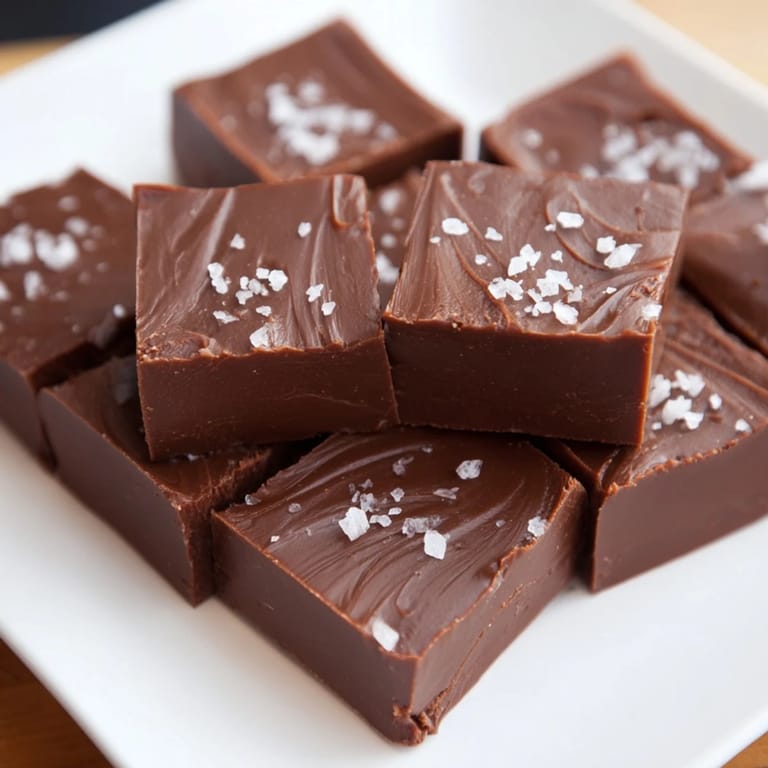
- Once set, lift the fudge out using those parchment flaps and cut it into 36 squares with a sharp, ideally warmed knife. A hot blade makes cleaner cuts.
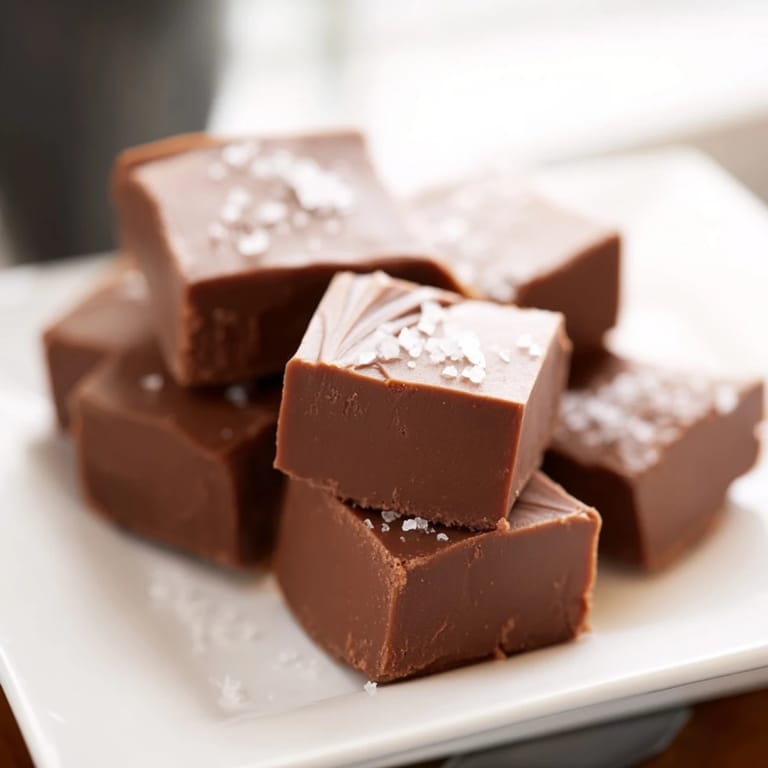 Save to Pinterest
 There's a moment when you stop stirring and realize you've actually made fudge—real, tangible, delicious fudge—and it's standing right there in front of you. That small victory of understanding temperature and timing feels bigger than it should.
Variations Worth Trying
The base recipe is beautiful on its own, but once you've made it successfully, you can start playing. Walnut or pecan fudge is the classic move—just fold in a cup of toasted nuts before pouring into the pan, and suddenly you've got texture and earthiness. Dark chocolate fudge feels more grown-up and less sweet, while milk chocolate leans into comfort-food territory. I've even added a pinch of espresso powder to one batch, and it made the chocolate taste more like itself, if that makes sense.
Storage and Keeping
Fudge keeps beautifully at room temperature in an airtight container for up to two weeks, though it rarely lasts that long in my house. If your kitchen runs warm or you want it to stay firmer longer, you can chill it in the refrigerator after the initial 2-hour set—just bring it back to room temperature before eating so the flavor really comes through. I've also frozen it successfully for up to three months, layered between parchment in a freezer-safe container.
Getting the Texture Just Right
The texture of fudge is everything, and it's completely in your control once you understand the temperature game. If you like yours softer and creamier, stop at 236°F and you'll have something almost melt-in-your-mouth. If you want it firmer and more slice-able, push to 240°F or even chill it in the fridge for an extra hour after the initial set. The humidity in your kitchen matters too—on very humid days, the fudge takes longer to fully set, so patience becomes your secret weapon. Finding your sweet spot (literally) might take a batch or two, but that's part of the joy.
- Use a candy thermometer you trust; an off-by-five-degrees thermometer will sabotage your entire batch.
- If your kitchen is humid, add that extra fridge time without hesitation—the fudge will thank you.
- Once you've made it once successfully, you'll develop an instinct for when it's ready, thermometer or not.
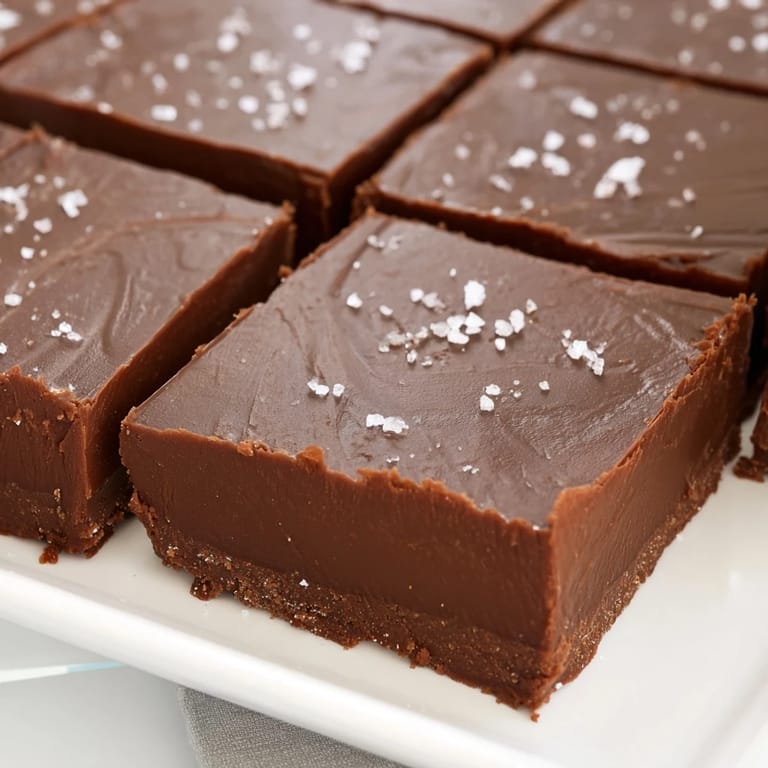 Save to Pinterest
 Homemade fudge is proof that simple ingredients and patience create something special. Make it, share it, and let it become one of those small things people remember you for.
Recipe FAQs
- → What is the soft-ball stage and why is it important?
The soft-ball stage is when the sugar syrup reaches about 238°F (114°C). It ensures the mixture will set correctly with a smooth, creamy texture.
- → Can I substitute dark chocolate instead of semi-sweet?
Yes, using dark chocolate gives a richer, more intense flavor, while semi-sweet provides balanced sweetness.
- → How do nuts affect the final texture?
Adding chopped toasted walnuts or pecans introduces a crunchy contrast to the smoothness, enhancing the eating experience.
- → Why is it recommended to use a candy thermometer?
A candy thermometer helps monitor precise temperature to reach the soft-ball stage, critical for achieving the perfect consistency.
- → What can I do if the confection is too soft after setting?
Chilling it in the refrigerator for an hour can help firm up the texture for easier slicing.